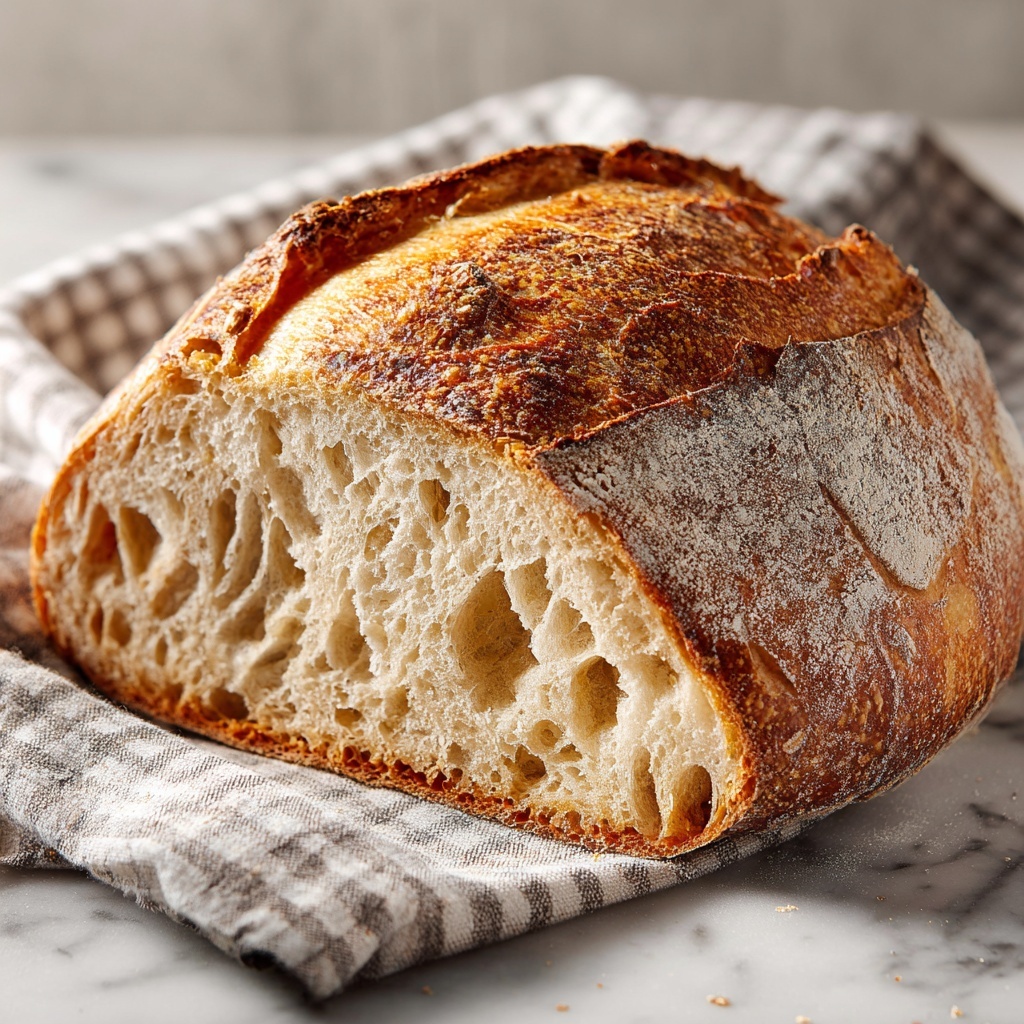
No Knead Salt Bread Recipe
Introduction
No Knead Salt Bread is a wonderfully simple and flavorful bread that requires minimal handling but delivers incredible taste and texture. With a soft crumb, crispy crust, and rich buttery rolls, this recipe is perfect for home bakers looking to enjoy artisan-style bread without the fuss of kneading.
Ingredients
- 1 cup + 2/3 cup (200 g) bread flour*
- 1/4 cup (30 g) cake flour*
- 1 tbsp + 1/4 tsp (14 g) sugar
- 1 tsp (4 g) salt
- 1/4 tsp (1.5 g) instant dry yeast for overnight method
- 2/3 tsp (3 g) instant dry yeast for same day method
- 1/2 cup (114 ml) 2% milk*
- 1/4 cup (60 ml) water
- 1 tbsp (15 g) unsalted butter or refined coconut oil, softened
- 5-6 tbsp salted butter (12-14 g butter per roll), for rolling
- Pearl salt, rock salt, pretzel salt, or flaky salt for topping
Instructions
- Step 1: In a bowl, combine bread flour, cake flour, sugar, salt, yeast, milk, and water. Mix until the dough comes together.
- Step 2: Add softened butter or coconut oil and incorporate it by squishing the dough. The dough will look rough. Cover and rest for 30 minutes.
- Step 3: Perform the first round of stretch-and-folds (4 folds total), then slap-and-fold the dough for 1 minute. Cover and rest another 30 minutes.
- Step 4: Repeat stretch-and-fold and slap-and-fold once more, resting for 20 minutes afterward.
- Step 5: Do one last set of stretch-and-fold followed by 1 minute of slap-and-fold. Cover and refrigerate overnight (8-12 hours) for proofing. For same day method, proof at room temperature for 60-90 minutes until doubled.
- Step 6: Remove dough from fridge and let it warm to 17–20°C. Prepare butter blocks for rolling, cutting 12-14 g pieces as needed and keep them frozen.
- Step 7: Punch down the dough, transfer to a work surface, and divide into 6 triangular pieces (about 70 g each). Add scraps to the center of a triangle.
- Step 8: Pinch opposite edges of each triangle to form a thin icicle shape, then roll gently to about 15 cm. Place seam-side down, cover, and rest 10-15 minutes.
- Step 9: Working with one piece at a time (rough side up), press the top edge down and roll the dough into a teardrop shape. Adjust length and width as desired. If dough shrinks, rest longer before continuing.
- Step 10: Place a frozen butter block at the base of the dough, fold the top edge over it without sealing completely, and roll toward the tip to create tension—avoid rolling too tight or loose.
- Step 11: Seal the tip gently and place seam-side down on a dark nonstick baking tray. Cover and repeat with remaining dough pieces.
- Step 12: Proof rolls for 55-65 minutes at 30-32°C until nearly doubled, jiggly, and a gentle poke springs back slowly with a faint indent.
- Step 13: Preheat oven to its highest temperature (about 230°C). Lightly mist the dough with water and sprinkle with salt just before baking.
- Step 14: Bake rolls using steam mode (2-5 minutes) if available, then reduce heat to 210°C and bake for 12-13 minutes until golden and crispy. If needed, extend baking by 5-8 minutes for full crispness.
- Step 15: If using a conventional or convection oven without steam, spray dough and oven walls multiple times before baking, then bake at recommended temperatures and times until golden and crisp.
- Step 16: Remove from oven, brush any leaked butter over the tops, and serve immediately. Enjoy!
Tips & Variations
- Use a kitchen scale for the most accurate measurements and best results.
- Adjust proofing times based on your kitchen temperature; longer, slower proofing develops more flavor.
- Experiment with different salts for topping to change flavor and texture—pretzel or flaky salt work beautifully.
- For a dairy-free version, use refined coconut oil instead of butter both in the dough and for rolling.
- You can shape the rolls into crescents by adjusting the base length of the dough before rolling.
Storage
Store leftover rolls in an airtight container at room temperature for up to 2 days for best freshness. To reheat, warm in a preheated oven at 180°C (350°F) for 5-10 minutes to restore crispness. Avoid storing in the fridge as it may dry the bread out.
How to Serve
Serve this delicious recipe with your favorite sides.
FAQs
Can I use all-purpose flour instead of bread and cake flour?
Yes, you can substitute all-purpose flour for both, though the bread may have a slightly different texture and rise. Using a combination of bread and cake flour helps achieve a balance of chewiness and tenderness.
Do I have to refrigerate the dough overnight?
Refrigeration helps develop flavor and make handling easier, but if you’re short on time, you can proof the dough at room temperature for 60-90 minutes until it doubles in size. The overnight method is recommended for best flavor and texture.